Use Sample issue to create and change handouts presentations. Changes will apply to all pages of printed handouts.
You can change the number of slides per page, page orientation, and slide size. You can also add or remove page numbers, headers, date and time, pictures, and backgrounds.
To open handout options, on the tab View in Group Sample Modes click the button Sample issue.
Changing the layout
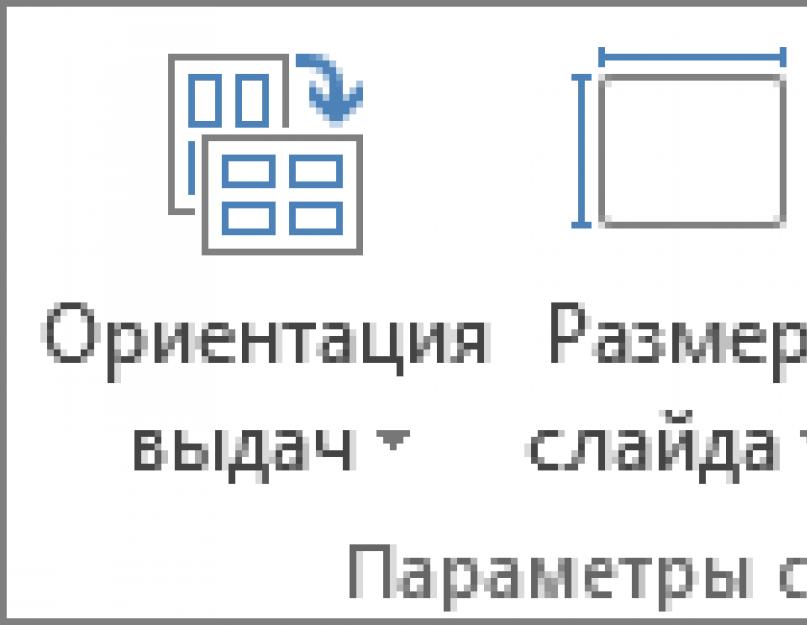
In Group Page settings You can specify the number of slides to print on each page, select slide layouts, change the orientation of the output, and set the slide size. To customize the layout as desired, use the options in all three menus: Issue orientation, Slide size and Number of slides per page.

Setting the number of slides per page

Advice: Layout 3 slides contains lines on which event participants can take notes.
Setting the orientation

Adjusting the Slide Size

Changing page numbers, headers, or dates
You can change header and footer settings in the group Fillers. By default, headers and footers are displayed in the top and bottom corners of the Sample Issue page.

Click the alt text ( header, footer, dates or page numbers) to make changes. You can follow the steps below.

Adding a logo and other images to handouts
Open the tab View on the ribbon and click the button Sample issue.
On the tab Insert click the button Drawings or another button (for example, Images from the Internet) depending on where the desired image is located.
Select an image and click the button Insert.
The image will be added to the center of the page.
Drag the image to the desired location and resize it if necessary. Additional formatting options are available on the tab Format section "Working with drawings".
Changing the background
You can change the background of the issue (but not the slides) in the group Background. You can also quickly select a different font for all search text at once, set special borders and visual effects.

Colors. Select a color theme for the SERP background. To see what it will look like, click Background styles and select one of the options.
Background styles. Select a style from the list. The colors displayed depend on what is selected in the list Colors.
Advice: Click Background format at the bottom of the list Background styles to open the area Format, and adjust advanced background options (such as advanced fill options, artistic effects, color and image options).
Fonts. Select a font from the list to quickly apply it to all headers and footers.
Effects. Select a theme effect (shadow, reflection, line, fill, etc.) from the list.
Handout Preview
To preview what your printed handouts will look like, follow these steps:

For getting additional information about working with PowerPoint handouts, see: Video: working with handouts
In the sample results, you can move, change the size and format of the headers and footers in the placeholders. Additionally, you can adjust the page orientation and specify the number of slides per handout page when printing.

1 . Indicate how many slides you want to print on each handout page.
2 . Change the size or format of the header placeholder, or move it.
3 . Change the size or format of the footer placeholder, or move it
View handout options
Click the section title below for detailed instructions.
Covers formatting with themes and layouts, setting a slide background, customizing headers and footers, adding hyperlinks and actions, creating sections and a table of contents, and editing a PowerPoint presentation theme.
Presentation
Speaker Deck YouTube SlideShare
Skills 77-429
Theory:
- Formatting your presentation with themes and layouts
Video version
Text version
A theme in PowerPoint includes a predefined set of colors, fonts (or rather a set of two fonts), special effects that can be applied to various objects, and often a background image. The presentation theme also controls the presentation page layouts.
A theme can be compared to a light version of a template. The main difference between a theme and a template is that a template can contain blanks for slides and certain content, for example, a template for a letter of congratulations will contain drawings, pre-prepared text, etc. The theme can simply change the fonts, colors, and page layouts used, but it will not create new slides with pre-prepared text.
In PowerPoint, templates have a *.potx extension, and themes are saved as files with a *.thmx extension. Moreover, files with the same extension are called Office themes, i.e. Once you save the theme in PowerPoint, you can use it in Word or Excel. Naturally, slide layouts will not be available, but when it comes to colors, fonts and effects, themes are a great way to unify presentations with Word and Excel documents.
As for templates, they are unique for each application in the Microsoft Office suite, i.e. a Word template only applies to a word processor, and you won't be able to create new book Excel from PowerPoint template.
Apply a theme and theme variant to a presentation
Starting with the 2013 version of Microsoft Office in PowerPoint, in addition to themes, it became possible to change the theme option. Theme options are pre-created sets of colors and font fills. The main difference from the theme is that the option cannot change the slide layouts, only its external design. Not all themes have options. As of May 2017, PowerPoint does not simple way create your own theme options, just like table styles in PowerPoint, creating options is only possible by editing *.XML theme files.
So, to apply a new theme to a presentation, just go to the “Design” tab and in the “Themes” group, click on the theme.
If you expand the themes window by clicking in the lower right corner, you can not only access more themes, but also save your changes as a theme, or open a theme that is not in the default themes folder. And by calling the context menu on the theme you like, you can get more options before applying it, for example, apply a new theme only to the current slide.

Theme options are located in the “Options” group, next to the themes, but they are only available for some themes and are created by developers with knowledge of the xml language. Applying a theme variant, if available, is exactly the same as applying a theme.

Changing Theme Colors
If you call the theme options drop-down command, additional theme settings will become available: colors, fonts, effects.
The theme color set consists of 12 colors that can be selected by the user. Plus, PowerPoint will automatically add five lighter shades to each color.

On a note
If you do not need to create a new set, but change an existing one, this can be done through the context menu on the set that needs to be changed
How theme colors work is easy to understand at simple example. Let's say that while editing a presentation, you set the text color in a text box to gray by selecting the theme color "Accent 1", then applied another theme, a variant of the current theme, or just a color set in which the "Accent" color is set to green, therefore the text color in The text field will change from gray to green. Here we should immediately remind you that using a color from the “Standard” group or choosing an arbitrary color from the palette will not change when you change the theme.
By the way, if you've ever copied text, charts, SmartArt, or WordArt from one presentation to another that used different themes, you may have seen the object's colors change after copying.

The theme colors are selected taking into account the specifics of the theme itself and so that they are combined with each other. It can be difficult to assemble the perfect set from scratch; it is much easier to choose the closest option and make changes to it, saving the set under a new name.
Changing theme fonts
Below the color selection command is the font selection command. You can select one of the preset settings, modify an existing set, and save it with a new name.

A set of two fonts is designated as: “Heading font” and “Body text font”. When you select a font in the drop-down list on the “Home” tab, these fonts are at the very top, and in brackets there is a signature, this is the font for headings or body text.

If the text is written in one of the theme fonts (with a mark), then when you change the theme or set of fonts, the font of the formatted text will change; if you select another font, it will be hardcoded and will not change when the theme changes. By the way, if you scroll down the list of installed fonts, you can find the same font, but without the “headings” or “body text” mark; installing it is similar to installing any other font from the list, i.e. will be firmly attached to the text.
The division of theme fonts into “Heading font” and “Body text font” is purely conditional, nothing more than a recommendation, you can use one font, or you can use the heading font to format the text, however, it is better to follow the recommendation, this will bring clarity to the formatting and subsequent support , especially if you need to change one of the theme fonts.
Apply a different layout to a slide
A slide layout is a slide template that can contain various visual elements, markings of the main components of the slide, for example, where the title will be, where the slide number is, etc.

The slide layout is selected when inserting a new slide on the “Home” tab using the “Create Slide” drop-down command of the “Slides” group; if you need to change the layout of an already created slide, you will have to use the “Layout” command from the same group, or from the context menu on the slide thumbnail. Layouts and their number are determined by the topic of the presentation.

We'll look at working with layouts in more detail later in this lesson.
- PowerPoint Slide Background
Video version
Text version
The PowerPoint theme sets the same background for all slides, within the same layout, of course, however, the user can not only change it to a different color, or a color with a gradient, but also set a different background for different slides, which is especially important if the background Drawings are installed, as for example, in the presentations of this course, on the title page of the lesson and the title pages of the lesson questions.
Change background PowerPoint slide you can either from the drop-down option command or using the “Background Format” command in the “Customize” group.
 Change the slide background
 As the background of the slide, you can select a color fill, set a gradient or transparency, and also put a background image. The “Background Format” panel has all the tools for fine-tuning.
Setting a PowerPoint Slide Background
Formatting a slide background is no different from setting a fill for a shape, such as a text box or table. The only noticeable difference is that the slide background you customize can be applied to all slides in your presentation at once.

As an example of creating a background fill, consider two interesting options: the first is setting a picture as a background, and the second is setting a gradient fill. Let us note once again that in this way you can customize absolutely any fill on a PowerPoint slide.
Setting a picture as the background
A well-chosen picture for the background of a slide can greatly embellish a presentation slide. At the same time, if you plan to place other objects there, you should make sure that the background of the slide does not interfere with the perception of information on it.

To set a picture as the background, select the “Pattern or Texture” switch in the “Background Format” sidebar, then the source options will appear under the switches: “File”, “Clipboard”, “On the Internet”:
- “On the Internet” – launches a search window for pictures on the World Wide Web. In our opinion, not the best option, because... Searching for images in your favorite search engine will give better results.
- “File” - if the picture is saved locally, then this command will launch a dialog box to open it.
- “Clipboard” is a very interesting command that allows you to paste a previously copied picture. You can search by pictures, for example, in Google, call up the context menu on the picture you like and select “Copy picture”, and then simply select the “Clipboard” command in PowerPoint and the picture will be installed instead of a fill. It is very convenient that there is no need to save drawings on the computer. This command works similarly with other applications; just copy the picture.

After inserting a picture as a fill, commands for adding effects (blurs, engraving, glass, shades of gray, etc.) as well as setting parameters for sharpness, brightness, and color temperature become available. These commands are similar to setting up a picture that can be inserted onto a presentation slide and will be discussed in detail in the corresponding lesson.
Setting up a gradient fill
Due to the fashion for “flat, simplified design,” gradient fills have gradually faded into the background or into the background, but its moderate use can sometimes come in handy. Just as with pictures, setting a gradient fill applies not only to the background of the slide, but to the fill of any figure, including a single cell (usually, of course, a group of cells) of the table.
So, setting the toggle to Gradient Fill in the Format Background panel will make several additional options available. At the top there are preset gradients; this option will come in handy not only for beginners, because you can select a preset gradient and then make fine adjustments.

Type – select how the colors will transition from one to another: linear transition, radial, rectangular, path, shadow from the title. The choice of type determines the direction of transition from one color to another, as well as the availability of some other parameters. For example, in case of linear type we can choose the gradient angle and direction, by default the gradient is distributed from the left top corner at an angle of 45 degrees.
However, for all gradients the basic setting is the same:
- on the scale we set gradient points with the “Add gradient point” command; if you need to delete them, there is a delete button nearby;
- select a specific point and give it a color, do not forget that if you select a color from the theme colors, they may change when the theme changes. The farther the points are from each other on the scale, the smoother the transition from one color to another will be. Under the color you can accurately see the position in % from the beginning of the scale of each specific point;
- You can optionally set transparency and brightness parameters.

That’s all for installing a gradient, on the one hand it’s simple, but on the other hand, choosing a beautiful transition is not always easy, you need to experiment, because there is always the “Restore background” command that will remove everything. You can set different backgrounds on different slides, select the best one and click the “Apply to all” option on it, setting the same background for the presentation slides.
Video version
Text version
A footer in PowerPoint, as in other Microsoft Office products, is a piece of text that is repeated across the slides of a presentation. A distinctive feature of PowerPoint headers and footers is that, despite the name “Footer,” the placement can be absolutely arbitrary at the top of the presentation, at the bottom, and on the sides, this is determined by the layout of the slide, as well as whether there will be a header or footer on the slide at all. Therefore, if you are using a non-standard theme for a presentation and, despite executing the command to insert a header and footer, it does not appear on the slide, it means that the author of the theme did not include it in the layout. There's nothing wrong with it, just change the layout. We'll look at changing the layout in the last question of this lesson. 
To insert headers and footers, go to the “Insert” tab and in the “Text” group select the “Header and Footers” command.

In the "Header and Footer" dialog box there are two tabs: Slide and Notes and Handouts. The first tab allows you to set up footers for the presentation slides, and the second allows you to set up footers for handouts if you plan to print the presentation. This distinction between headers and footers can be convenient, for example, on handouts you can additionally display contact information, whereas on each slide of the presentation itself they would look out of place. Unlike slides, handouts also have a header, similar to MS Word.

On the right is a preview window for the placement of added headers and footers; as previously mentioned, the presence of the header itself is determined by the structure of the slide layout, therefore, if they are not provided, adding headers and footers will not do anything (unless you change the layout or change the structure of the existing one).

To complete the topic of headers and footers, we can mention such a technique as adding an automatically updated date. If you have prepared a presentation and give it at several events that are also spaced out in time, then inserting an auto-updating date on the slides will give the audience the impression that the speech was prepared specifically for this event.
- Hyperlinks in PowerPoint Presentations
Video version
Text version
Using hyperlinks, you can quickly navigate both to a specific location in the presentation and to external resources, such as a website. In PowerPoint presentations, a hyperlink can be represented as either text or a picture. 
Adding text hyperlinks
To insert a hyperlink, select the text and call the “Link” command in the “Links” group on the “Insert” tab. To insert a hyperlink, there is a hotkey combination Ctrl+K; this combination inserts or changes a hyperlink not only in PowerPoint, but also in Word, Excel, OneNote, Outlook and some other applications. You can change an existing hyperlink through the context menu or by calling the “Link” command again.

If you don't want hyperlinks to stand out on the slide, you can link not to the text itself, but to the shape in which the text is placed. However, inserting a link to the figure itself is not always convenient, because there are cases when one paragraph can contain several hyperlinks, in this case you can configure appearance text hyperlinks in theme colors, although you won’t be able to get rid of the underscore.

The Insert Hyperlink dialog box allows you to create a link to an arbitrary file, email address, or Internet page address. By creating links to files you can build interesting scenarios, for example, linking together presentations on a specific topic by breaking the presentation into sections.
 Insert Hyperlink Dialog Box
 In addition, if you select the “Place in Document” item, you can make a link to any slide in the presentation. Before the introduction of the “Tables of Contents” feature (available starting in PowerPoint 2016, we’ll look at the fifth question in this lesson), a table of contents was created using hyperlinks to slides in a presentation.

Adding a graphical hyperlink and actions to a slide
A hyperlink in a presentation does not have to be text; it can be a picture or any other graphic element. The process of adding a hyperlink to a picture is no different from a text hyperlink; the only thing that should be mentioned is that, unlike text, pictures-hyperlinks do not stand out on the slide in any way, so, of course, you will have to take care of the possible graphic design yourself, if necessary .

More interesting, from the point of view of the possibilities offered, are the actions. Using Actions in PowerPoint, you can create various tasks, for example, move to a new slide, launch a program. For actions in PowerPoint, special buttons have been created, which are located on the “Insert” tab, the “Illustrations” group, the “Shapes” command, and here at the bottom of the list is the “Control Buttons” group.

On a note
The Shapes command is also available from the Home tab, Drawing group.
In fact, it is not necessary to perform actions using control buttons; an action can be assigned to any drawing, a shape or text; this is done using the “Action” command from the “Links” group of the “Insert” tab.

The “Action Settings” dialog box allows you to configure the action either by clicking or simply by hovering the mouse over an object, for example, you can place pictures with birds, and when you hover the mouse over a specific bird, play its sound.
Testing Hyperlinks and Actions
In the presentation editing mode, to follow a hyperlink, you must hold down the Ctrl key while clicking with the mouse; however, actions in the editing mode cannot be tested; you will need to run the presentation for display. Let us remind you that you can start a presentation both from the beginning (hotkey F5) and from the current slide (combination Shift +F5). The presentation is launched from the “Slideshow” tab.
- Sections in PowerPoint
Video version
Text version
Adding sections to a presentation will break it into logical parts, which will make it easier to manage slides from sections, for example, minimize those that are not currently needed, swap or delete, etc.
But the most important thing that division into sections gives is the ability to automatically create links to these sections with a very beautiful transition effect. For example, if the presentation is a report on departments, then grouping the departments will allow you to move from the selected slide to the desired department in any order. Or, in our case, you can move from the table of contents to any question in the lesson. Also, an automatically assembled table of contents requires dividing the presentation into sections, but here it is not necessary to do the division into sections in advance. PowerPoint will do it yourself when creating the table of contents.

To create a section, just click between the slides where the section should appear and on the “Home” tab in the “Slides” group select the “Sections / Add Section” command. Here you can immediately note simple commands for working with sections: rename, delete, collapse. Their purpose is clear from the name.

You can also add a section by calling the context menu between the slides, and if you call it on the created section, all operations of the section command will become available.
Creating a table of contents
Go to the “Insert” tab and in the “Links” group select the drop-down command “Table of Contents / Interactive Table of Contents”. If sections have been created, then PowerPoint will independently mark the first slides of each section; if not, then you will have to mark them in the “Create an interactive table of contents” dialog box, and PowerPoint will create sections based on the marks.

If you have sections in your presentation that you do not want to show in the table of contents, then during the process of creating the table of contents, uncheck the initial slides of such sections and make sure that the “Keep unused sections in presentation” option is checked, otherwise PowerPoint will delete such sections , and the slides of these sections will merge with those marked in the dialog box.
After the operation of creating a table of contents, a new slide will be created with thumbnails of the first slides of each section. To make the table of contents look beautiful, it is a good idea to make sure that these slides are attractive. This does not have to be done before creating the table of contents; any changes made to these slides will be displayed in the table of contents.


Essentially, the created table of contents is a group of shapes that you can resize and move freely around the slide, as well as change the slide layout.
Create a link to a slide or section
If to create a table of contents you did not need to create a new slide in advance, it was created automatically, then you can insert a link to a slide or section only on some slide. After inserting such a link, you can quickly move to the desired slide or section; the process of creating links is absolutely identical to creating a table of contents.

In fact, links to a slide or section are an extension of the insertion of hyperlinks to slides when detailed or minor information was not included in the main report. There is no need to select a slide image and make a hyperlink to it, with the Table of Contents function, the slide thumbnail will always update itself as changes are made to the slide.
The Table of Contents feature is available starting in PowerPoint 2016
Video version
Text version
One presentation template, or even a presentation theme, may contain more slide layouts than another, inserting headers and footers on a slide we may find that they are simply not provided, not to mention the very different appearance of the theme slides. So where is the appearance of the slide, its layout and their number determined?
The “Slide Master” command, which is located in the “Sample Modes” group on the “View” tab, is responsible for the structure of the presentation slides. This command launches the presentation theme editing mode, the key element of which is slide layouts.

Editing slide layouts
To edit a theme, which can later be saved, an additional “Slide Master” tab is launched on the interface ribbon, using the commands on this tab and most of the operations to change the theme of the presentation take place. The user can change: the number of slide layouts, their external design, determine the presence and location of headers and footers, adjust the size of the slides and, very importantly, the aspect ratio. And this is not a complete list.
Sample mode is very convenient to use if you need to make bulk changes to already finished presentation, for example, add a graphic with a logo to all presentation slides. Just insert a new element on the slide layout and all slides that use this layout will automatically update with this element.

Slide Layout Structure
“Slide Master” is responsible for the external design and structure of the slides, and now it is not a tab of the same name, but a set of standard slide layouts, which includes one master slide and subordinate slides (11 pieces). Changes in the master slide entail the same changes in other layouts and, accordingly, on all slides of the presentation. At the same time, changes to a specific layout will only be displayed on slides that are built on this layout.

On the master slide, it is advisable to define headers, footers, font and size, list bullets, etc. information that should be uniform throughout the presentation. This, for example, can include a background image or fill, if this is appropriate for the theme.
Changes to specific layouts will only affect slides that use that layout. Obviously, the layout for a section title and a regular slide should be different.
At the same time, in a specific layout, you can redefine the settings of the master slide (for example, remove the header, make an individual background fill, or change the location of the page number), thus highlighting the slides based on it from the crowd. Or you can even make each layout unique, leaving only the common theme font.

By default, with the “Insert Slide Master” command, we insert a standard set of layouts that is present in an empty presentation. Each individual topic can have an arbitrary number of slide layouts; they can be deleted, duplicated, or changed in location.
Editing the layouts themselves is slightly different from editing presentation slides: on a slide we can add text, pictures, tables, change the fill, etc. However, these are layouts, not slides, therefore, all changes made to the layout will affect not only the new slides that are planned to be created based on it, but also the already created slides. Awareness of this fact allows us to edit the layout to mean changing the general concept of the future slide, i.e. where should the graphic element be, where is the text, etc.
The main group of commands for editing are the commands located in the “Sample Layout” group; if a master slide is selected, then the “Master Layout” command is active for it, which allows you to select those elements that will be common to all presentation slides. The master slide itself does not serve as a layout, i.e. You cannot create a presentation slide based on it, so the other commands from the “Sample Layout” group are not active.

At the same time, we can add a regular text field to the master slides, for example, with information about rights, and this text field will be added to all slide layouts.

By the way, on the master slide the text, by default, is presented as a bulleted list with dots; in most themes it remains that way, but you can change the bullets, make the list numbered, or remove it altogether.
Editing a Slide Layout
Editing the layout is the direct layout of future slides. When we select a layout in the layout tree on the left, in the “Sample Layout” group, the following commands become available:

If during the editing process you deleted some of the header and footer elements in the layout, then turning off/on the option again will add them to the slide again with the design provided in the master slide.

All the placeholders on the slide layout are nothing more than a recommendation to the user: “This is where the page number will be, and this is where the diagram looks good.” The user can create a slide based on the Title Page layout, remove the title placeholder, and insert a chart. The same as completely changing the preset formatting
Editing Placeholders
Any of the added placeholders can move freely around the slide area. Editing placeholders on a slide layout is no different from editing various objects on the slide itself. In the “Sample Layout” group, select the type of placeholder; if you have doubts about the type of content, you can select a universal placeholder, especially since this is just a recommendation to the user. If the placeholder is, or can be, text, then we make additional settings: we select the font size, its alignment, and also determine whether it should be a bulleted list or just text.
When editing placeholders, special attention should be paid to the elements of the footer: date, slide number, and the footer itself. Most likely, the user will not change the location of these elements, especially considering that in the right themes, the location of the footer elements is usually combined with the background formatting of the slide.
As an example of proper placement, the slide number will be in a visually different place and, for example, on a bright bookmark. Information about the author or contact information is often placed in the footer itself, so such information does not have to be placed on all layouts; you can mark the slides with section titles, placing them in a well-readable but unobtrusive place.

Working with background images
Many themed presentations contain background images that can be a great visual addition to the presentation. As for background images, there is one nuance that needs to be remembered.
Adding a background from the Background group is the same as changing the background from the Design tab, so if the user changes the background, it will be replaced. However, any figure added to the layout will be in the background for the user creating the presentation, i.e. everything that fits on the slide is above, with the exception of the custom background image, i.e. it will be located below the object added in layout editing mode.
A classic example is the logo on the presentations of this course, and the translucent cut-off gray figure on the left.

The procedure for adding a background image is no different from that in the presentation mode, the only thing is that the background editing sidebar is launched by clicking on additional parameters from the “Background” group of the “Slide Master” tab.

Create a new layout
A presentation theme can contain an arbitrary number of slide layouts; you can add a new layout by simply copying (duplicating) an existing one, in exactly the same way as with presentation slide thumbnails. You can also use the “Insert Layout” command from the “Change Sample” group; here you can also find commands for renaming and deleting (you can simply press the Delete key) the layout.

Change theme formatting in sample mode and save it
In the first question of this lesson, we looked in detail at working with the theme, fonts and theme colors. The user can easily change these parameters using the Design tab. In layout editing mode, the Design tab disappears and theme commands are found in the Background group of the Slide Master tab.
Sometimes it is difficult to start developing a new theme from scratch, and there are themes that you want to modify. Modify existing topic can be done in two absolutely identical ways:
- Using the “Design” tab, apply themes, and then go into layout editing mode and change it;
- open a blank presentation, switch to slide master mode and use the “Themes” command to select the theme that needs to be modified.
Saving a modified theme
In order to record your modifications to editing and formatting the presentation topic, you must save them. Saving a modified theme is possible both through the “Design” tab, “Themes/Save current themes” group, and through the additional “Slide Master” tab, “Themes/Save current theme” command.

The header and footer are called header data, placed above or below text on several or all pages of a document. They usually contain the title of the work, part, chapter, paragraph, copyright information, company logo, page number, time or date of creation of the slide, etc.
For slide Microsoft PowerPoint Only the footer can be specified.
Header text, unlike other headings and inscriptions, is repeated on each slide. When you create headers and footers in Microsoft PowerPoint, you don't have to manually type this information on each slide. When you add new slides to your document, a footer is automatically attached to them.
You can access the settings for headers and footers in Microsoft PowerPoint by clicking the Header and Footers button on the Insert tab of the control ribbon. After this, the Header and Footer dialog box opens, which contains two tabs: Slide And Notes and Issues. Let's look at the elements of each tab.
Slide dialog box Headers and footers You can customize the display of headers and footers on a presentation slide. Consider these elements:
- date and time- allows you to add a date and time to the footer, the format of which can be set using a group of controls and drop-down lists. For example, you can choose a specific fixed date or synchronize it with the current time. You can also determine how the date is displayed by selecting one of the standard methods in the drop-down list, or enter the date yourself;
- Slide number- allows you to number the slides. The corresponding slide number will be added to the footer;
- footer- in the installed position allows you to unlock the corresponding input field, in which you can set arbitrary text for the footer;
- Do not show on title slide- determines whether the header and footer will be displayed on the first slide of the presentation;
- Apply to all- fixes the changes made to all footers of all presentation slides. Button Apply commits changes made only to the slide that was selected when the dialog box opened Headers and footers.
In this way you can easily number the slides in automatic mode. When adding or deleting slides, the numbering will be automatically set in accordance with new version presentation, which is undoubtedly very convenient. Also quite a convenient feature is the ability to include the date and time the slide was created directly in the slide footer.
Tab controls Notes and Issues dialog box Headers and footers you can configure the display of headers and footers in printed version presentations. Here, PowerPoint gives you a little more customization options than in the previous case. The difference is the ability to add a header to the page. This is done by checking the box Page header and the corresponding input field.
Notice the bottom right part of the dialog box Headers and footers. This shows a schematic view of the headers and footers on a page or slide.
Please note that when print presentation, in addition to the headers and footers installed on the tab Notes and Issues dialog box Headers and footers, the slides' own footers will also be printed.
In addition to the color scheme, a presentation design template includes sample slides, a title slide, notes pages, and handouts that define the standard design of these elements. By changing the template, you can modify all the slides of the presentation at once. The slide master contains the following components:
* background color, which can have smooth tone transitions;
* default formatting options for fonts, headings and bulleted lists;
* additional objects placed in the background of the slides;
* three special fields displaying the date, slide number and footer text.
Let's change the background of the slides and enable the display of the service fields listed above.
Rice. 14.9. Set the slide master background in PowerPoint
1. Select a team View > Master > Slide Master. A slide master appears with five placeholders and a toolbar Sample with several buttons allowing you to enter a new pattern, delete, save and rename it. Using the techniques described in Exercises 1 and 2 of this lesson, you can edit the slide master, change placeholder sizes, fill, border, and font, and list bullets. The formatting you perform will affect all presentation slides except the title slide.
Note To modify the title slide design, format the title template. The title sample is located second in the row of sample slides. To navigate to it from the master slide, press the Page Down key.
2. Run the command Format > Background. Using the dialog box that opens (Fig. 14.9), you can customize the background not only of the sample, but also of any specific slide.
3. In the drop-down list of the dialog box Background select item Filling methods, which provides access to patterned and gradient background fills.
4. On the tab Gradient dialog boxes Filling methods, shown in Fig. 14.10, select the switch position Two colors.

Rice. 14.10. Selecting a gradient fill in PowerPoint
Note Tabs Texture, Pattern And Drawing allow you to set a texture fill, a geometric pattern or a drawing of any graphic format as the slide background. If you don't like the gradient fill, choose the background to suit your taste.
5. Select Position from the corner switch Hatch type.
6. In section Options select the top right square.
7. Then click on the button OK.
8. In the dialog window Background click on the button Apply to all to assign the selected background to both the slide master and title slide master.
9. To activate three additional objects located at the bottom of the sample, select the command View > Header and Footer.
10. Select switch position Auto update to display the date the presentation was last updated (if the checkbox is cleared Date and time, install it).
11. On the list Language select item Russian.
12. Check the box Slide number to add the slide number in the lower right corner.
13. In the field footer enter the text Communications that will now appear on each slide (the checkbox must be checked footer.

Rice. 14.11. New background and captions on the bottom edge of the presentation slide
14. Click on the button Apply to all.
15. Using a button Close toolbar Sample return to slide view.
The updated third slide is shown in Fig. 14.11. The rest of the presentation slides will look the same.
If you have forgotten the exact name or location of your presentation, you can use the Basic Search to find a file by any known data, for example, by part of the presentation name or a fragment of its content. For a more in-depth search, use the panel Advanced Search, which allows you to specify a criterion that includes a file property (for example, name, subject, creation date, or number of slides), a condition (greater than, before or after, equal to, and others), and a value. For example, the criterion "File name includes garden" finds all files whose name contains the word "garden". IN in this case"filename" is a property, "includes" is a condition, and "garden" is a value. If you have Quick Find installed on your computer, PowerPoint can organize information to help you find it faster. If this feature is not installed, click the button Install on the taskbar Basic Search.
Presentation properties can be entered at any time by opening the dialog box Presentation Properties. These values may be useful later when using search functions.
Follow these steps to enter presentation properties and locate the .
PowerPoint will search for files that match your criteria. After completing the search in the task pane Search Results A list of found files will be displayed. To open any of them, just double-click on its name.
Adding a header and footer
Before you print your presentation, you can insert headers and footers that appear on every slide, notes page, or output. Typically, headers and footers contain useful information, such as the name of the presentation author, company name, current date, or page number. Because PowerPoint allows you to add multiple headers and footers, you can set different headers for your slides, handouts, and speaker notes. Adding headers and footers is done using the command Header and Footer V